Boosted Insights can be used to upload independent data. This data doesn't have to match with anything in the Boosted Insights database, so is entirely up to the user's discretion.
Independent data uploads are useful for users who want to analyze the predictiveness of time series data as it relates to metrics and goals that they choose.
There are two ways to upload your independent data. One, by clicking on the upload button on the main page of Boosted Insights – where it will bring you to a screen with three upload options: Upload Portfolio, Upload Integrated Data, and Upload Independent Data. Select Upload Independent Data. Or, you can click on the top right of every screen on Boosted Insights, where a drop-down menu will give you the option to click on Custom Data. That screen will show which custom data you have uploaded, which are ingesting (downloading for your use), and a blue button that says Upload New Independent Dataset.

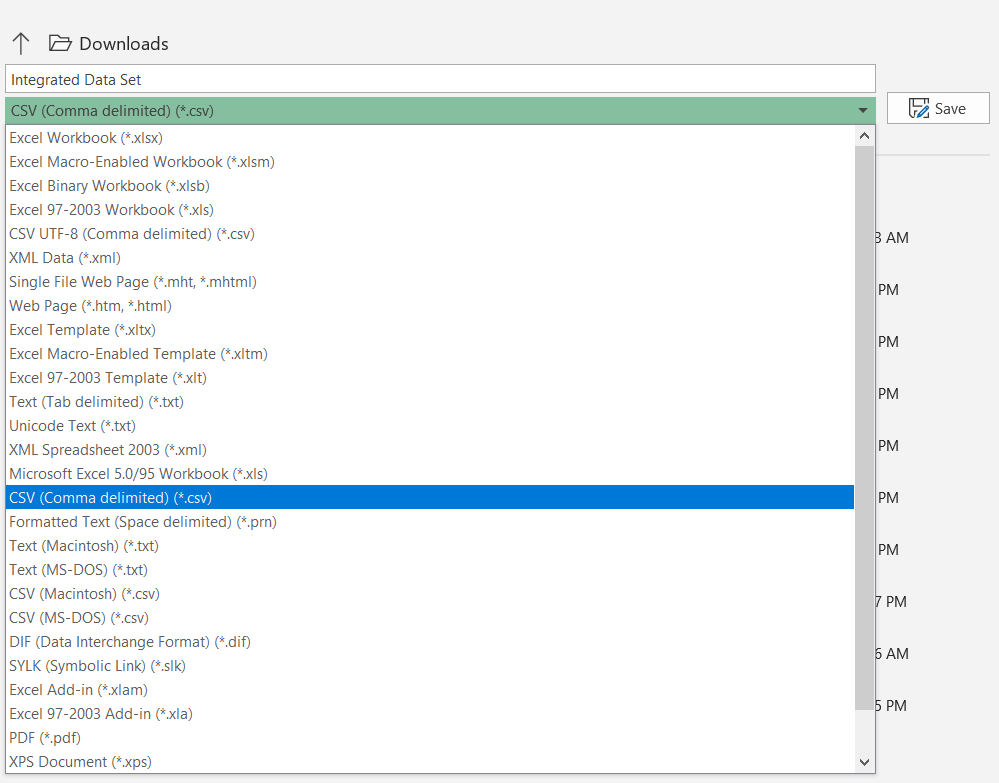
Once you navigate to the Upload New Independent Dataset page, you must give your dataset a name, then upload it by clicking the section that says Select a file. Your file must be saved in CSV format (in Excel, click File, Save As, CSV (Comma delimited). Note that there may be another option in Excel, to save as a CSV UTF-8 – do not save your file with this option.
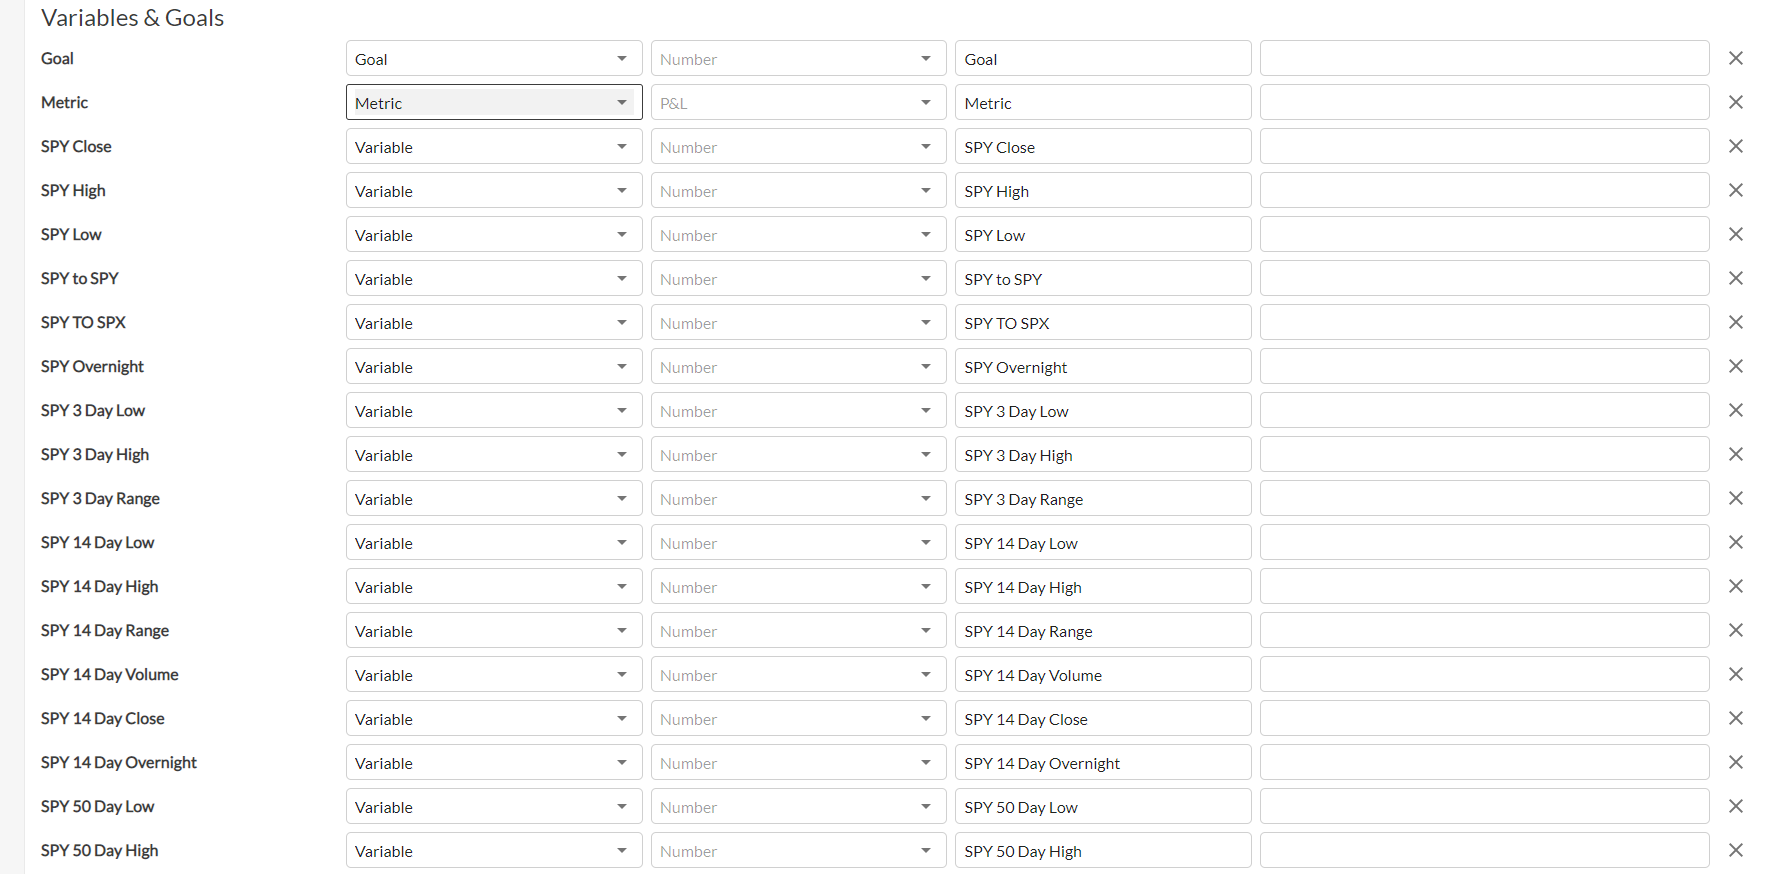
After you select your custom CSV file, a new screen will appear. Here, your object names will show up, along with your goal, metric and various variables. You must select both a goal and a metric under the Variables and Goals section in the pull-down tabs. You may also rename or delete any of the goals, metrics or variables you have uploaded by using the X beside them. When you are finished, ensure you scroll to the bottom of the page and click Upload Dataset.
USING EXCEL
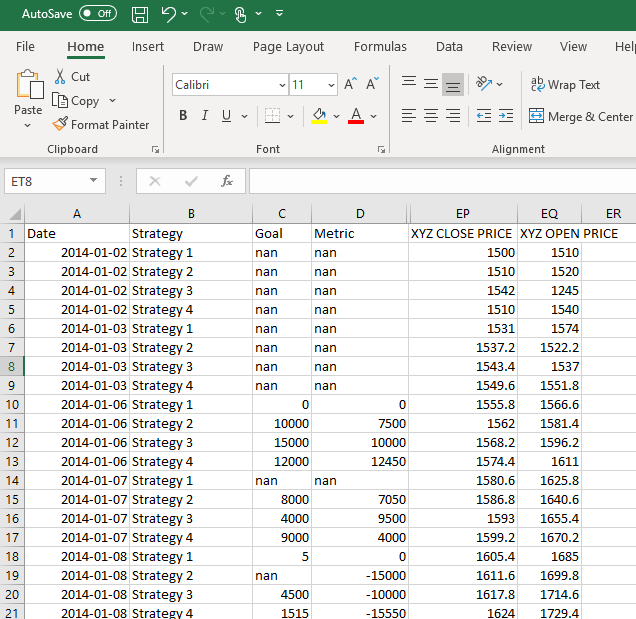
Here is a sample Excel worksheet. Note that the leftmost column must be the date. The second column must be the object name, each with a unique identifier. ie: Strategy1, Strategy 2, Strategy 3, Strategy 4. These must line up with the dates on the left. If you have 4 strategies to test, there should be 4 rows with the first date of your strategy, 4 rows with the second date of your strategy, and so on. There must be a column for strategy goal and another column for strategy metric. The columns that follow are for various variables, which you may opt to include, but are not necessary for your custom upload. The only values in the other columns must be numeric values. If you don’t have a numeric value for a particular date or strategy, you can use the term “nan” (not a number) in the field or simply leave the field blank.
There must be at least three years of data in the CSV, otherwise it will not ingest in Boosted Insights.
NEW MODEL
Once your independent data is uploaded (time to upload varies but can be anywhere from 10 minutes to an hour), you can create a new model. These steps are largely the same as creating a model without custom data.
On the main page of Boosted Insights, click + New Model in the top right corner of the screen.
After you name your model and move to the model type screen, select Single Model Custom Strategy under the training type pull down menu. In the model type pull down menu there are six model options to choose from, along with explanations of their use and cost.
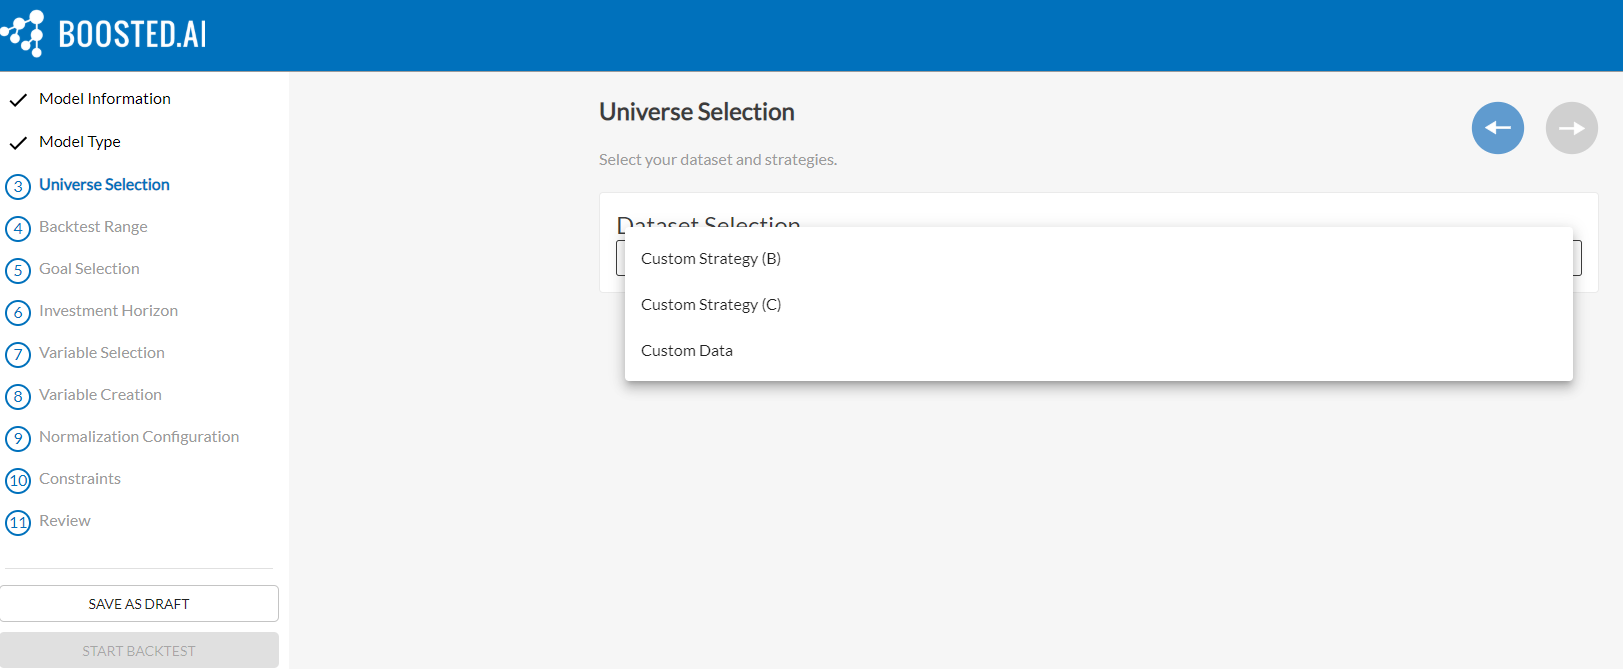
The next screen, Universe Selection, is where you choose your custom uploaded data. Under Dataset Selection, select your data.
Backtest range operates the same as when you create a model without custom data. (More info...)
Goal selection operates the same as when you create a model without custom data. (More info...)
Investment Horizon operates the same as when you create a model without custom data. (More info...)
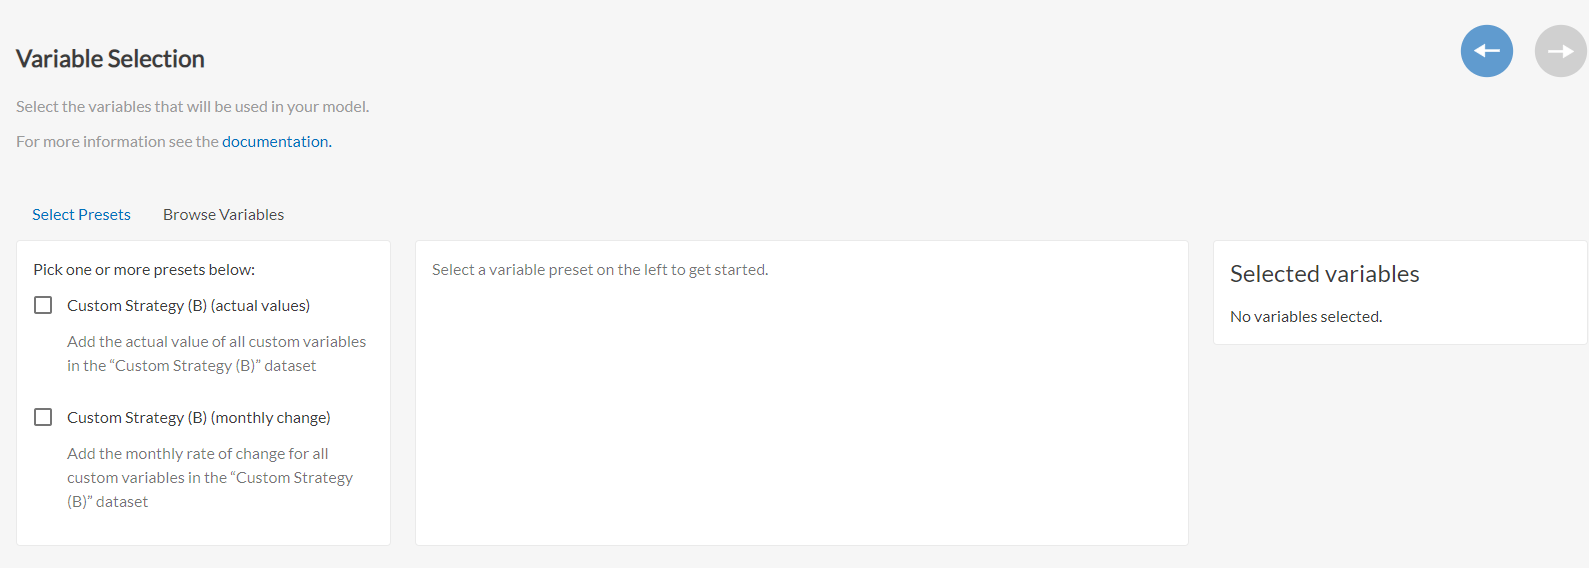
Variable Selection is where you can choose to from the variables you included in your independent data upload. Under Select Presets, you can select either the actual values of your independent data, the monthly change of the values of your independent data, or both. Under Browse Variables, you can get more specific with which of your custom variables you choose to add, selecting each individual one. FRED (Federal Reserve Economic Data) variables are also an option in this tab.
Variable creation operates the same as when you create a model without custom data. (More info...)
Normalization configuration operates the same as when you create a model without custom data. (More info...)
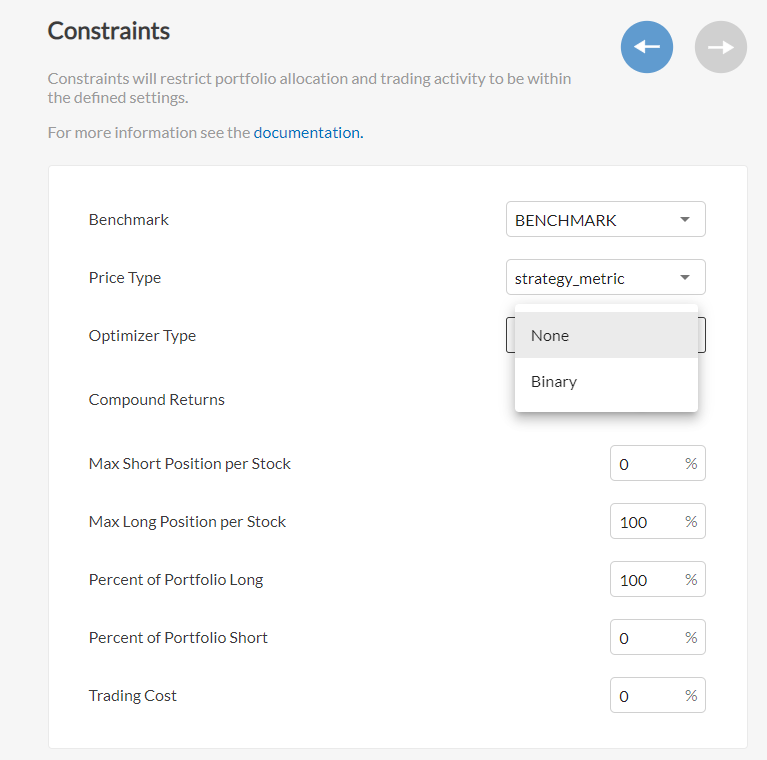
Constraints are where you choose your metric. First, choose the benchmark you want to compare your strategy to. You may also compare one strategy to another using the pull-down menu. Next, under Price Type, select your strategy metric. Finally, choose an optimizer type. It can be either binary or none.
Finally, review your model, and if you are happy with your goal, metric and variables, click Start Backtest.